This time one year ago, in April 2019, our Casita became our temporary full time home while we moved our household from the Dallas, Texas, metro area to our new home in Colorado’s grand valley, where the Colorado and Gunnison rivers join on the western slope.

My first joint new home / Casita project in a month after we moved into our new house was to construct a fenced and gated concrete RV pad next to garage of our new house where our Casita could comfortably berth.
Unfortunately, local building codes did not allow me to replace the deep loose gravel RV drive with a concrete drive from the street up to my new concrete RV pad.


The loose gravel drive, that is on a slight incline, has been a problem every time I back the Casita from the street up onto its concrete pad.
The Casita tires and truck tires sink into the loose gravel up to the rims, and I have to back with the the truck locked into 4WD to force my rig through the considerable resistance of the deep loose gravel.
The gate area target I must back the Casta through has only about 12” of clearance on each side. Backing my rig up with my Casita and tow vehicle tires all plowing through the loose gravel drive incline, making a sharp turn on street pavement that transitions to the loose gravel drive, with the truck locked into 4WD, while navigating a blind 12” side to side clearance, with my gate target out of view in the rear mirrors, is a bit of challenge even for me.
By mid-March of a normal year, I’d be de-winterizing the Casita and getting it ready for camping season travel, but spring 2020, unfortunately, isn’t a normal year with so many camping areas around the U.S. indefinitely closed.
Since we are staying at home for a while, I decided to celebrate our first new home anniversary with another joint home / Casita project to fix my loose gravel RV drive problem.


I started a project to install a Standartpark durable plastic EasyPave gravel paving grid panel system on the gravel RV drive — see photo. This gravel paving system panels is engineered somewhat on the same principle as the steel panel paving system employed by Army engineers and Seabees (construction battalions) during World War II to rapidly build air station runways on soft terrain.
The photos at right show the RV drive just before I started my EasyPaver project, and the deeply rutted ground I found under the deep gravel. I shoveled the deep bed of loose gravel from the RV driveway into big gravel piles on the main driveway. This cleared the RV drive area of the gravel so I could build up a short retaining wall on one side. I then leveled the underlying dirt, filling in the deep tire ruts that had been hiding under the gravel.
I prepared an even ground base then shoveled most of the piles of gravel I had shoveled onto the main driveway back onto RV drive space to make an even gravel base of proper depth for the interconnecting EasyPave grid system panels. I used a gas engine compactor to compact the gravel base tight and flat.
Next, I laid out and snapped together the EasyPave 16”X24” panels 7 across and 12 down in the RV driveway space, which is 123” across and 183” down. That left a 6” margin down each side and a 1” margin at the top and bottom of the driveway.
Once the grid panels were in place on the gravel base, I shovel the remaining gravel into the panel grid cells and top dressed the grid with a 1” (approximately) dressing of gravel. The gravel filled paving grid with a thin top dressing of gravel is not visible and provides a solid surface as good as a concrete drive.
The photos below show the compacted gravel base prepared for the EasyPave grid to be laid out.


Next, below, all the EasyPave grid panels are snapped together and starting to be filled with 3/4 gravel.


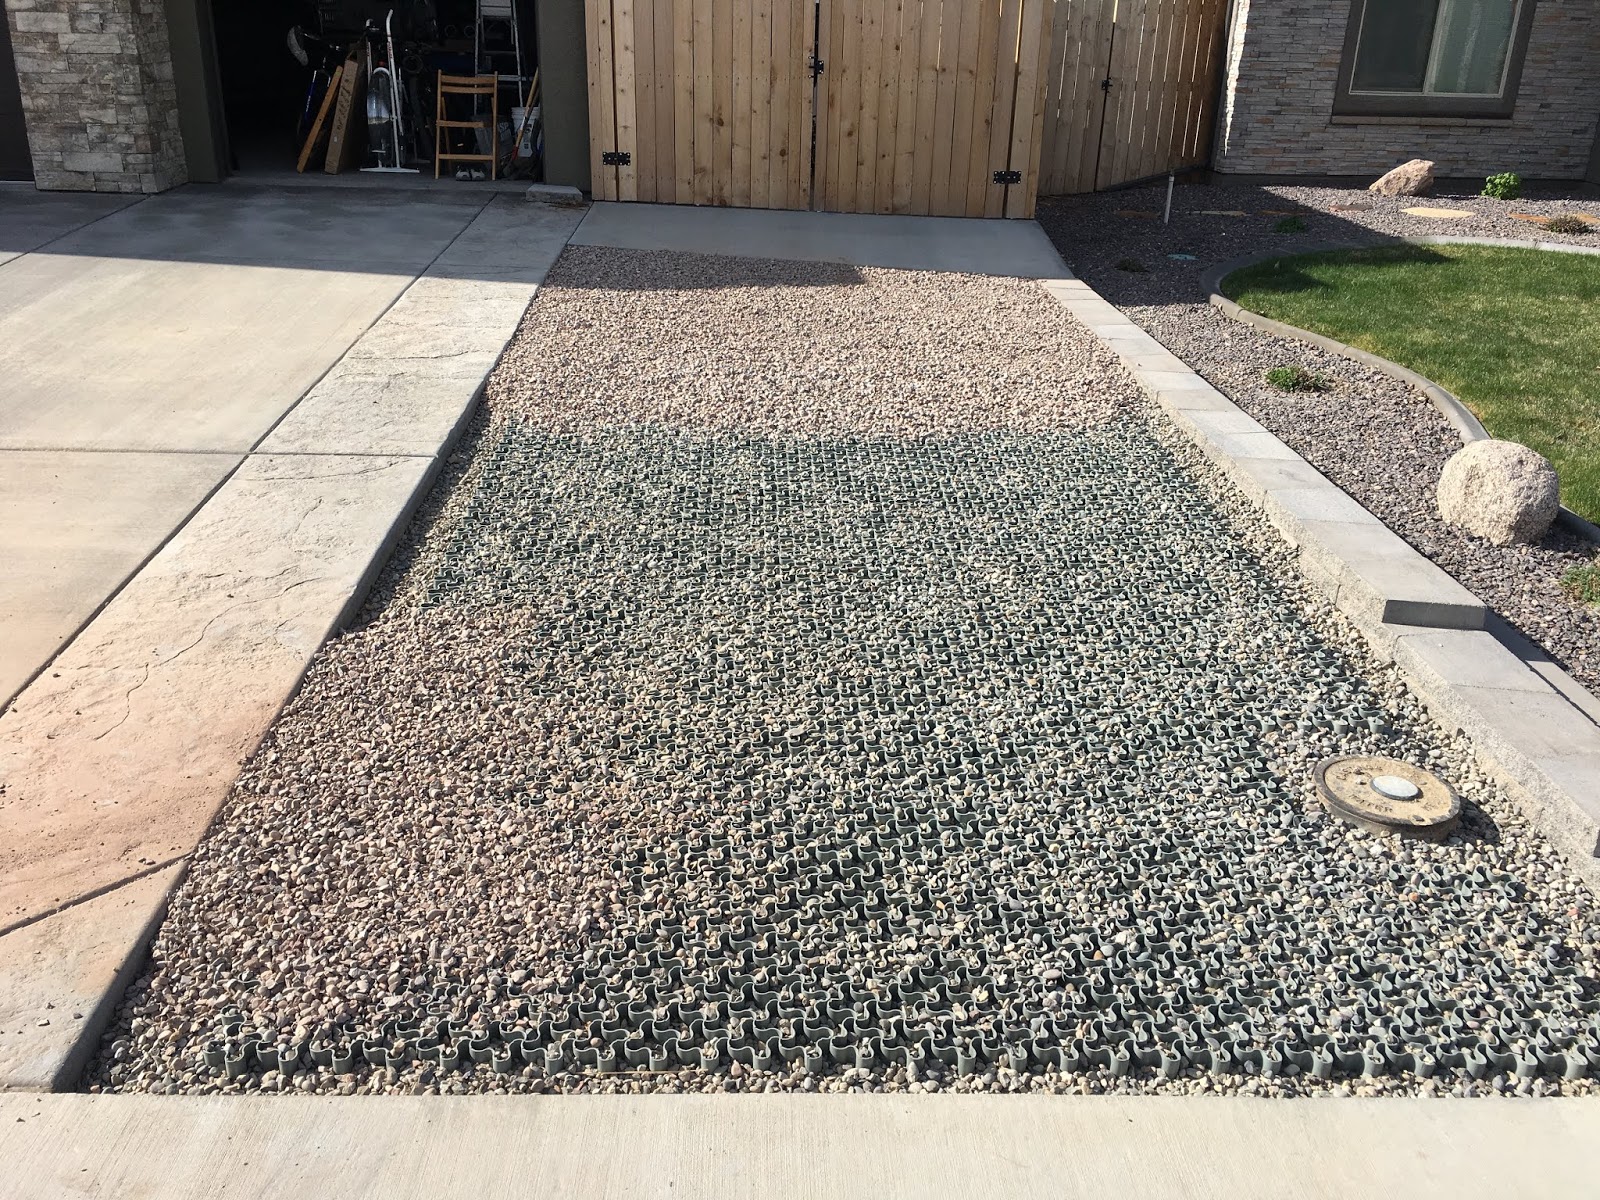
Finally, below, is the finished drive after the EasyPaver grid has been filled and top dressed with a 1” layer of 3/4 gravel.


